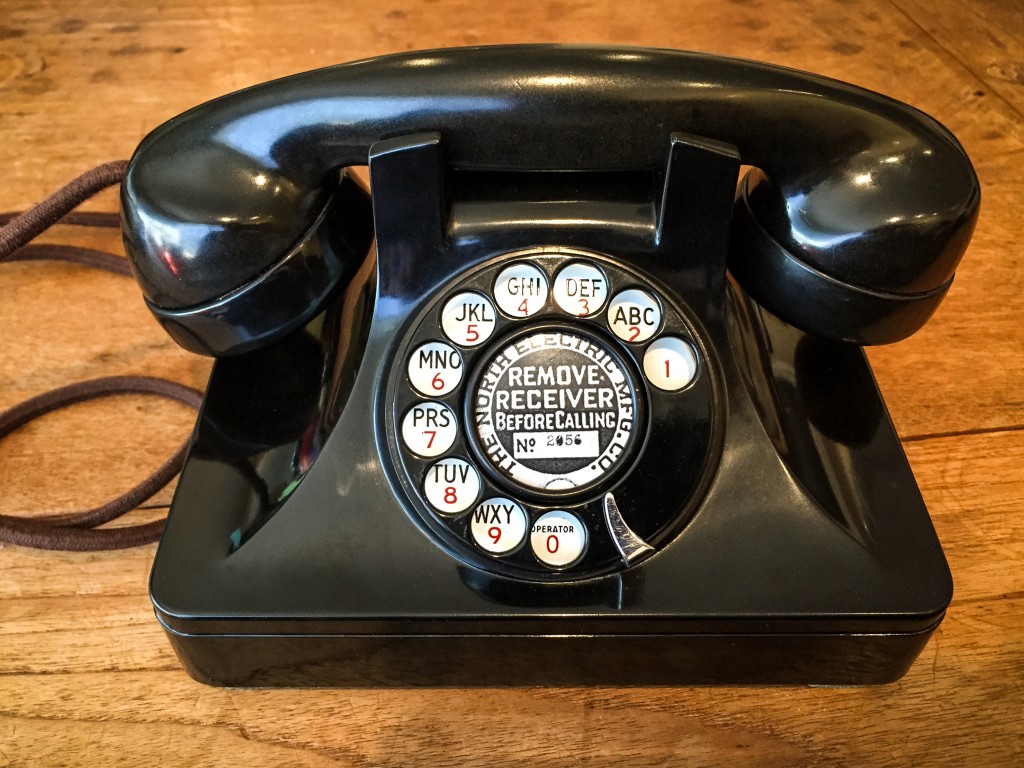
In keeping with our obsession with old technology, we recently acquired a beautiful 1947 model 7H6 North Electric rotary dial telephone and got it working on our phone system in the OO office. In the early 1940’s the 7H6 body was made of metal but during the war, the units were made from a dense early plastic called Bakelite which gives the phone a nice solid feel.
The classic shape is modeled after the Western Electric 302 phone designed by Henry Dreyfuss who also designed many other American industrial classics for John Deere, Hoover and the NYC Hudson locomotive.
We successfully connected the old phone to our Asterisk VoIP phone system and can make and receive calls just like any other regular extension – the ringer sounds amazing! See instructions below if you are also looking to connect your rotary phone to a VoIP phone system!

North Electric 7H6 rotary dial phone – Note the cloth cord.
[UPDATE Jan 2022] Readily available analog pulse to VoIP ATA converter
The Grandstream GS-HT802 ATA works very will with FreePBX and pulse devices such as this rotary pone. The HT802 is a breeze to set up on PJSIP and is fully supported in EndPoint Manager.
Configuration and setup of Asterisk (FreePBX) and the IAXy.
Our challenge was to connect this phone to our Asterisk VoIP office phone system to be able to make and receive phone calls. Because this is a rotary phone, we needed to convert the pulse dialing (the clicks made by the rotary dial) to tones that Asterisk can understand. Digium used to make the perfect device – the Digium IAXy s101i which can be found on eBay for around $15.
- Digium IAXy setup:
- Add an IP reservation for the IAXy MAC address.
- NOTE: The IAXy uses BOOTP so be sure to enable that on your DHCP server. BOOTP is enabled by default on pfSense so our IAXy got an IP right away after adding the reservation.
- If you need to reset the IAXy, remove all cables except power and perform a 5/5/5 reset.
- NOTE: To power up the IAXy correctly, it is important to connect the cables in the following order:
- 1) Ethernet, 2) phone, and finally, 3) power.
- Add an IP reservation for the IAXy MAC address.
- Download and compile the IAXy configuration utility, iaxyprov. iaxyprov complied correctly for us on Linux and Mac OS X. (Grab a copy of iaxyprov here if svn is down.)
greg@dev [~]$ svn co http://svn.digium.com/svn/iaxyprov/trunk iaxy
greg@dev [~]$ cd iaxy
greg@dev [~/iaxy]$ make
greg@dev [~/iaxy]$ ./iaxyprov
Usage: provision <ip[:port]> <file>
- Edit the configuration file to be sent to the IAXy:
greg@dev [~/iaxy]$ cp iaxy.conf.sample iaxy.conf
greg@dev [~/iaxy]$ vi iaxy.conf
- Change the following to match your IAXy IP address and Asterisk extension username and password:
server: 192.168.0.123
user: myuser
pass: mypass
- Save the iaxy.conf file and push it to the IAXy device using iaxyprov:
greg@dev [~/iaxy]# ./iaxyprov 192.168.0.123 iaxy.conf
Provisioning is 42 bytes
Total packet is 56 bytes
Got response back from '192.168.0.123'
- Notes on provisioning the IAXy extension in FreePBX:
- Add a new extension with Device type set to “Generic IAX2 Device”
- Set requirecalltoken to No.
- Set Secret to match the pass: option in the iaxy.conf file.
- Extension number should match user: in iaxy.conf.
- Apply the settings to FreePBX and reboot the IAXy device – if you see a bright blue LED then you’re done!
- If you are having problems, SSH into your Asterisk server and run asterisk -vvvr and look for errors.
- Enjoy!

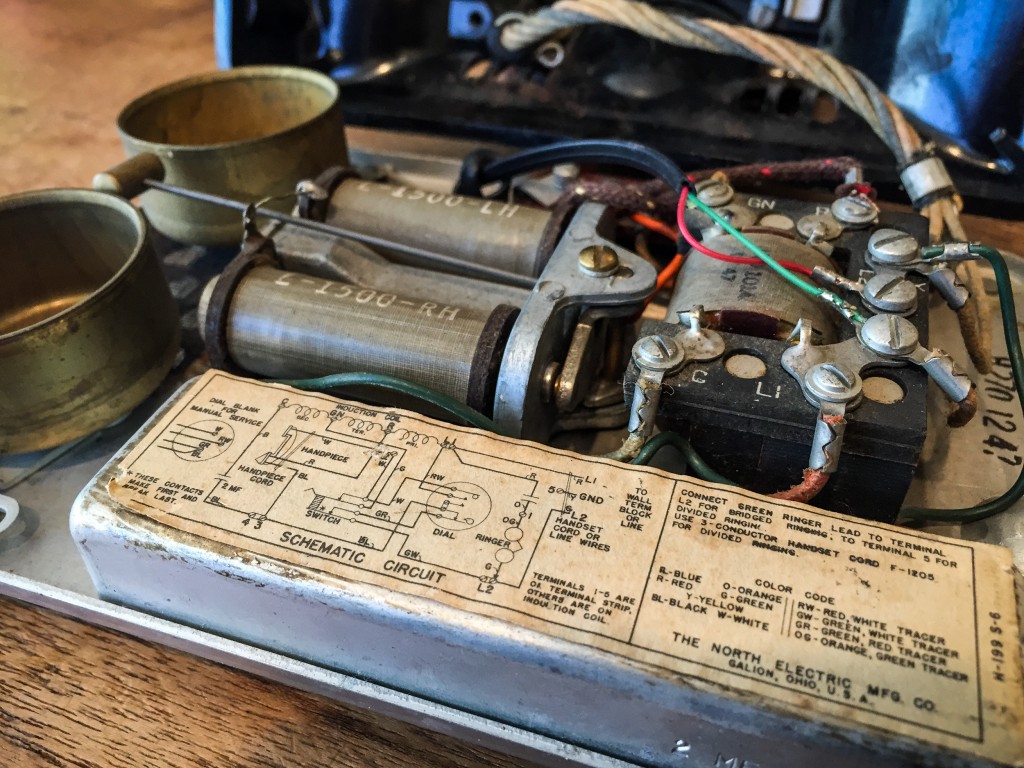
Internal design is also beautiful, including full electronic schematics.